Showing posts with label linux. Show all posts

Monday, March 07, 2016

Install Shinny & Rstudio over NginX

Installing Shinny & Rstudio Open Source over Nginx


Today I will install in Centos 7:
  • Shinny and Rstudio web
  • NginX
  • And will Configure Nginx to serve as proxy for Shinny and Rstudio Web
  • All of this using the most basic setup in Digital Ocean
    
    
    #create user
    useradd admin/crodriguez
    passwd xxxxxx
    
    vi /etc/sudoers
    
    
    #Add user to wheel group for admin priviledges
    gpasswd -a crodriguez wheel
    
    
    #Or make him kindoff rootie User privilege speficication ;)
    admin ALL=(ALL) ALL
    
    
    # From now remember to use the created user to run all commands
    
    # 0. If you have less than 8 GB  RAM
    #lets make swap bigger in 1 GB
    
    sudo /bin/dd if=/dev/zero of=/var/swap.1 bs=1M count=1024
    sudo /sbin/mkswap /var/swap.1
    sudo /sbin/swapon /var/swap.1
    sudo sh -c 'echo "/var/swap.1 swap swap defaults 0 0 " >> /etc/fstab'
    
    #Now we're over with the preparations. Lets begin with the installation
    
    # 1. Lets install NgNx
    
    #install EPEL release
    sudo yum install epel-release
    sudo yum install nginx 
    
    #start the web server
    #in centos 7
     sudo systemctl start nginx
    
    # if you're using any flavor of ubuntu
    # sudo /etc/init.d/nginx start
    
    # Leave it as a service once the server starts
    sudo systemctl enable nginx
    
    # review if directory was created /usr/share/nginx/html
    
    # 2. install R from EPEL 
    sudo yum install R
    
    #3.  Download and install Rstudio for RH/Centos
    #change the version number if there's a newer release :) 
    
    wget http://download2.rstudio.org/rstudio-server-rhel-0.99.491-x86_64.rpm
    sudo yum install --nogpgcheck rstudio-server-rhel-0.99.491-x86_64.rpm
     
    
    #4. install "shinny" package from cran
    sudo su - -c "R -e \"install.packages('shiny', repos='http://cran.rstudio.com/')\""
    
    
    #5. Download shiny RPM
    
    wget https://download3.rstudio.org/centos5.9/x86_64/shiny-server-1.4.1.759-rh5-x86_64.rpm
    
    #6. Install shiny RPM :)
    
    sudo yum install --nogpgcheck shiny-server-1.4.1.759-rh5-x86_64.rpm
    
    
    #7. review shiny server status
    sudo systemctl status shiny-server
    
    #8 Create a group for shinny server config and server running
    
    sudo groupadd shiny-apps
    sudo usermod -aG shiny-apps crodriguez
    sudo usermod -aG shiny-apps shiny
    
    #change server directory owner and permissions
    #replace crodriguez for your user
    
    cd /srv/
    sudo  chown --recursive  crodriguez:shiny-apps shiny-server/
    #Change mode to all stuff in the dir
    cd shiny-server/
    sudo chmod g+w .
    sudo chmod g+s .
    
    #we're really changing permissions over some hard links. ( ls -l ) 
    
    lrwxrwxrwx 1 crodriguez shiny-apps 38 Jan 28 15:55 index.html -> /opt/shiny-server/samples/welcome.html
    lrwxrwxrwx 1 crodriguez shiny-apps 37 Jan 28 15:55 sample-apps -> /opt/shiny-server/samples/sample-apps
    
    #TODO everythin in  /srv/shiny-server will be served as an app
    
    #9. Config NGINX so we can use it as proxy for Rstudio and NGINX. For pretty URLs you know ;)
    
    sudo mkdir /etc/nginx/sites-available
    sudo mkdir /etc/nginx/sites-enabled
    
    
    #9.1 Include links to recently created config dirs in nginx.conf.
    # inside http{} block and before server{} block include the two lines *.conf and add some memory for server names domain 
    
    sudo vi /etc/nginx/nginx.conf
    
    include /etc/nginx/sites-enabled/*.conf;
    server_names_hash_bucket_size 64;


    #9.2 Add virtual locations on http{} block
    
            location /shiny/ {
               proxy_pass http://127.0.0.1:3838/;
               proxy_http_version 1.1;
               proxy_set_header Upgrade $http_upgrade;
               proxy_set_header Connection "upgrade";
            }
    
            location /rstudio/{
               proxy_pass http://127.0.0.1:8787/;
               proxy_http_version 1.1;
               proxy_set_header Upgrade $http_upgrade;
               proxy_set_header Connection "upgrade";
            }
    
    #10. restart Nginx
     sudo systemctl restart  nginx
    
    
    #10.1 Install Rmarkdown
    # Two easy steps
    
    #rebuild yum cache ( just because we haven't done this yet )
    sudo yum makecache fast
    
    #install libcurl / libcurl-devel y openssl openssl-devel
    sudo yum -y install libcurl libcurl-devel openssl openssl-devel
    
    #install R devtools
     sudo su - -c "R -e \"install.packages('devtools', repos='http://cran.rstudio.com/')\""
    
    #install rmarkdown
     sudo su - -c "R -e \"install.packages('rmarkdown', repos='http://cran.rstudio.com/')\""
    
    
    #11. If everything it's ok
    
    #verify installation
    whereis rstudio-server
    sudo rstudio-server verify-installation
    sudo rstudio-server status
    
    
    #Bonus. with devtools and git you can install packages from github but "git" its allways a nice thing to have  :)
    sudo yum install git


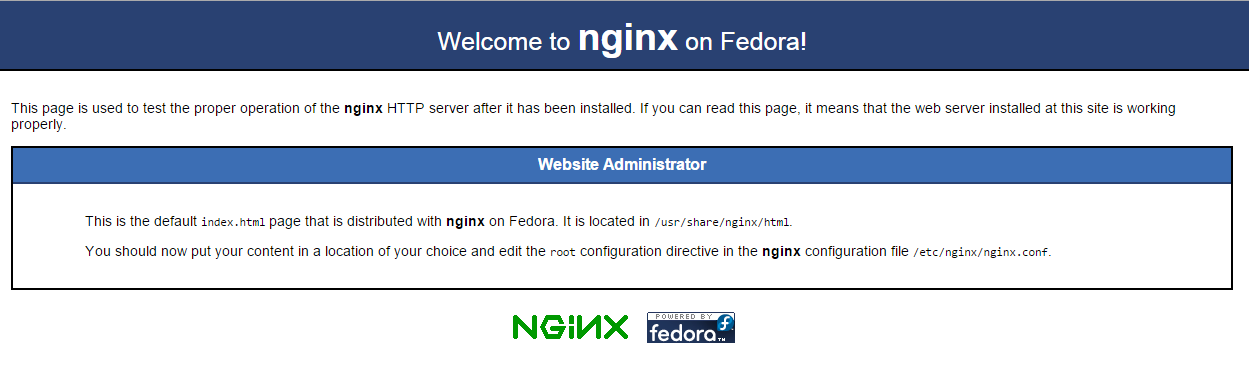
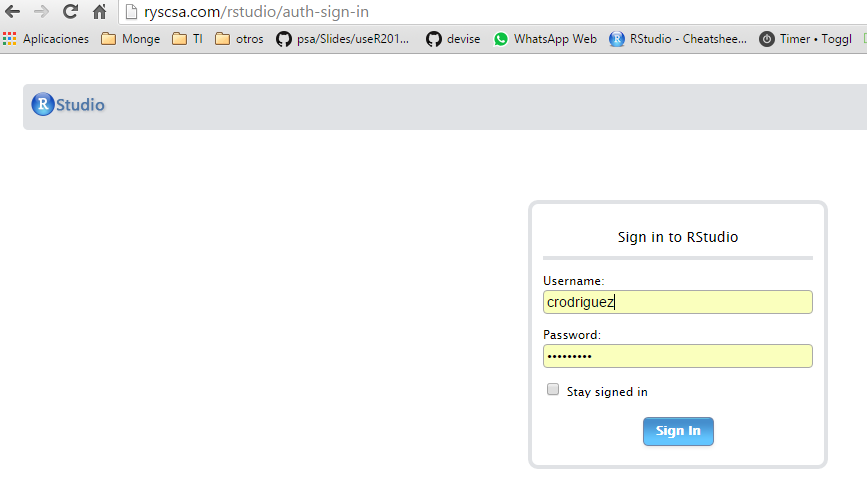
    This is how it should look

    1. NGINX

    2. Rstudio

    3. Shinny

    Thursday, January 14, 2016

    My vim setup

    My VIM


    First entry after a long time....

    Every time I take over a new linux machine and I want to create some scripts is to setup my enviroment. And as retrograde as I am, I love VIM as long as its not a java development, in that case My weapon of choice is eclipse.... Anyways, this is my reminder not to loose much time looking for git repositories and stuff.. ( This week alone I've had to change two laptops because of different reasons ).

    As I love easy setup things I just go and Install Vundle plugin
    1. git clone https://github.com/VundleVim/Vundle.vim.git ~/.vim/bundle/Vundle.vim
    Copy my .vimrc to the ~/.vimrc
    set nocompatible
    filetype off
    
    set rtp+=~/.vim/bundle/Vundle.vim
    call vundle#begin()
    
    Plugin 'VundleVim/Vundle.vim'
    Plugin 'tpope/vim-fugitive'
    Plugin 'SirVer/ultisnips'
    Plugin 'honza/vim-snippets'
    Plugin 'flazz/vim-colorschemes'
    Plugin 'bling/vim-airline'
    Plugin 'henrik/vim-ruby-runner'
    Plugin 'kchmck/vim-coffee-script'
    Plugin 'scrooloose/nerdtree'
    Plugin 'scrooloose/syntastic'
    Plugin 'tpope/vim-abolish'
    Plugin 'tpope/vim-endwise'
    Plugin 'tpope/vim-rails'
    Plugin 'vim-ruby/vim-ruby'
    Plugin 'Valloric/YouCompleteMe'
    
    call vundle#end()
    filetype plugin indent on
    
    " ┌───────────────────────────────────┐
    " │       Plugins customizations      │
    " └───────────────────────────────────┘
    "
    " NERDTree
    nmap  :NERDTreeToggle
    
    let g:UltiSnipsExpandTrigger=""
    let g:UltiSnipsJumpForwardTrigger=""
    let g:UltiSnipsJumpBackwardTrigger=""
    let g:UltiSnipsEditSplit="vertical"
    
    
    " vim-airline
    set laststatus=2
    let g:airline_powerline_fonts = 1
    set t_Co=256
    "
    " " ┌───────────────────────────────────┐
    " " │             Settings              │
    " " └───────────────────────────────────┘
    "
    " " Completion
    autocmd FileType ruby,eruby set omnifunc=rubycomplete#Complete
    autocmd FileType python     set omnifunc=pythoncomplete#Complete
    autocmd FileType javascript set omnifunc=javascriptcomplete#CompleteJS
    autocmd FileType html       set omnifunc=htmlcomplete#CompleteTags
    autocmd FileType css        set omnifunc=csscomplete#CompleteCSS
    autocmd FileType xml        set omnifunc=xmlcomplete#CompleteTags
    autocmd FileType php        set omnifunc=phpcomplete#CompletePHP
    autocmd FileType c          set omnifunc=ccomplete#Complete
    
    autocmd FileType ruby,eruby let g:rubycomplete_buffer_loading = 1
    autocmd FileType ruby,eruby let g:rubycomplete_rails = 1
    autocmd FileType ruby,eruby let g:rubycomplete_classes_in_global = 1
    
    "let g:SuperTabDefaultCompletitionType = ""
    let g:SuperTabDefaultCompletionType = "context"
    
    " Autoindent with two spaces, always expand tabs
    set tabstop=2
    set shiftwidth=2
    set expandtab
    
    " Folding settings
    set nofoldenable
    set wildmode=list:longest " make cmdline tab completion similar to bash
    set wildmenu " enable ctrl-n and ctrl-p to scroll thru matches
    set wildignore=*.o,*.obj,*~ " stuff to ignore when tab completing
    
    " Vertical / horizontal scroll off settings
    set scrolloff=3
    set sidescrolloff=7
    set sidescroll=1
    
    
    " Ignore case in searches
    set ignorecase
    
    set splitright
    set splitbelow
    set nobackup
    set noswapfile
    
    
    let g:syntastic_javascript_checkers = ['jshint']
    let g:syntastic_html_tidy_ignore_errors=[" proprietary attribute \"ng-"]
    let g:syntastic_mode_map={ 'mode': 'active',
                             \ 'active_filetypes': ['ruby', 'javascript'],
                             \ 'passive_filetypes': ['html'] }
    
    " ┌───────────────────────────────────┐
    " │               Theme               │
    " └───────────────────────────────────┘
    
    " Fonts for Linux
    set guifont=Bitstream\ Vera\ Sans\ Mono\ 9
    " set guifont=Monospace\ 10
    
    
    " Don't show the top bar
    " iset guioptions-=T
    
    " Syntax on
    syntax enable
    colorscheme summerfruit256
    
    if has("gui_running")
      set lines=57
      set columns=237
    
      " Highlight the line and the column of the current position of cursor
      set cursorline
    "  set cursorcolumn
      hi CursorLine guibg=#FFFF66
    "  hi CursorColumn guibg=#222222
    endif


    For one of the plugins [Valloric/YouCompleteme]. You need to compile some libs therefore you need to make sure you have the python developer libs 
    In Ubuntu it will be: sudo apt-get install python-dev